关于yocto:
Yocto refers:
- 官方版本库 https://git.yoctoproject.org/poky
- yocto与bitbake版本的对应关系 https://wiki.yoctoproject.org/wiki/Releases
- yocto的手册:https://docs.yoctoproject.org/index.html
Bitbike refers:
bitbake
在.bbappend所在目录中添加资源文件
via: https://stackoverflow.com/questions/50743109/yocto-bitbake-path-variable-for-append-file-directory
FILESEXTRAPATHS_prepend := "${THISDIR}:"
SRC_URI += "file://yourfile"
do_install_append(){
      install -d ${D}/some-dest-dir
      install -m 0644 ${S}/yourfile ${D}/some-dest-dir/
}
添加任务
方法1,用addtask:
do_make_scr() {
    ./tool/mkimage -A arm -T script -O linux -d boot.txt boot.scr
    kdjfd
}

addtask make_scr after do_compile before do_deploy
方法2,直接添加xxx_append或者xxx_prepend函数:
do_install_append() {
    install -d ${D}${datadir}/applications
    install -d ${D}${datadir}/pixmaps
    install -d ${D}${libdir}/${PN}/defaults/pref
    ...
}
关于tmp/work/????/{recipe}/{ver}/下的文件

- build:
bitbake问题集
No valid terminal found, unable to open devshell.
$ apt install tmux

## 强制重新执行
## 在一个recipe中添加多个initscripts,用update-rc.d类

> refer: http://www.embeddedlinux.org.cn/OEManual/update-rc-d_class.html
分多个子包,并让${PN}包依赖子包
PACKAGES =+ "{PN}-fix-eth-mac {PN}-mount-user" RDEPENDS_{PN} = "{PN} = "{PN} = "{PN} = "{PN}-fix-eth-mac ${PN}-mount-user"
inherit update-rc.d
INITSCRIPT_PACKAGES = "${PN} ${PN}-fix-eth-mac ${PN}-mount-user"
INITSCRIPT_NAME_{PN} = "rc.local" INITSCRIPT_PARAMS_{PN} = "start 99 2 3 4 5 ."
INITSCRIPT_NAME_{PN}-fix-eth-mac = "fix-eth-mac" INITSCRIPT_PARAMS_{PN}-fix-eth-mac = "start 10 2 3 4 5 ."
INITSCRIPT_NAME_{PN}-mount-user = "mount-user-partition" INITSCRIPT_PARAMS_{PN}-mount-user = "start 02 S ."
记得添加这些文件,让他们存在于package中
FILES_{PN} = " \ {sysconfdir}/ \ {sysconfdir}/init.d/rc.local \ " FILES_{PN}-fix-eth-mac = "{PN}-fix-eth-mac = "{PN}-fix-eth-mac = "{PN}-fix-eth-mac = "{sysconfdir}/init.d/fix-eth-mac" FILES_{sysconfdir}/init.d/fix-eth-mac" FILES_{PN}-fix-eth-mac = "{PN}-fix-eth-mac = "{PN}-fix-eth-mac = "{PN}-fix-eth-mac = "{sysconfdir}/init.d/fix-eth-mac" FILES_{sysconfdir}/init.d/fix-eth-mac" FILES_{PN}-mount-user = "${sysconfdir}/init.d/mount-user-partition"
## yocto查询各类信息方法指南

> via: https://www.cnblogs.com/liushuhe1990/articles/13218041.html

### 查找可以编译的image和machine名称

以下指令都在source下执行。

查找image:
查找可用的machine名称
### 查找bitbake中各个包可用的指令

使用以下指令:
显示package的可以执行的指令列表,

### 查找buildlog(编译等日志)的位置

下面这个是kernel的buildlog

build/tmp/work/phyflex_imx6_2-phytec-linux-gnueabi/linux-mainline/4.1.36-phy3-r0.0/temp

**文件夹内容**
请注意在这个路径中

- phyflex_imx6_2-phytec-linux-gnueabi
- linux-mainline
- 4.1.36-phy3-r0.0

为平台相关,请按照你的平台来查找。


### 查找内核的.config文件位置

在编译完成后,会在deploy文件夹生成一个config文件,如

**文件夹内容**
其中的 zImage.config 文件就是kernel的 config。

编译时,kernel使用的config位于

build/tmp/work/phyflex_imx6_2-phytec-linux-gnueabi/linux-mainline/4.1.36-phy3-r0.0/build/.config

**文件夹内容**
### 查找文件系统中某个文件是属于哪个软件包/某个软件包包含哪些文件

使用以下指令
可以看出 /usr/lib/xorg/modules/input/tslib_drv.so 这个文件是属于 xf86-input-tslib 这个软件包。

oe-pkgdata-util还有其他一些功能,可以查看它的帮助。如查找某个软件包会在文件系统部署哪些文件:
### 查找包之间的依赖关系

首先用下面的命令生成dot格式的依赖树。
此时在build下生成3个文件

| 文件名             | 内容                                        |
| ------------------ | ------------------------------------------- |
| pn-buildlist       | 包列表                                      |
| task-depends.dot   | yocto执行的task(如xxx.do_fetch)的依赖关系 |
| recipe-depends.dot | 包的依赖关系                                |


然后下载 oe-depends-dot 文件,这个文件是2018年5月份新增的,因此老的yocto中不包含此文件,需要下载,请在 https://github.com/openembedded/openembedded-core/blob/master/scripts/oe-depends-dot 这里点raw按钮获得下载链接。

然后将这个文件复制到 sources/poky/scripts/ 中,再加上可执行权限。
接下来就可以在build目录下执行 oe-depends-dot 文件来查找依赖关系,具体方法请查看 -h 帮助。
Analyse recipe-depends.dot generated by bitbake -g
positional arguments: dotfile Specify the dotfile
optional arguments: -h, --help show this help message and exit -k KEY, --key KEY Specify the key, e.g., recipe name -d, --depends Print the key's dependencies -w, --why Print why the key is built -r, --remove Remove duplicated dependencies to reduce the size of the dot files. For example, A->B, B->C, A->C, then A->C can be removed.
Use oe-depends-dot --help to get help
以下举例,查找为何image中包含iperf3
查找iperf3依赖哪些包
###  查找各个软件包在文件系统中的大小

在yocto的 build/buildhistory/image/[机器名]/glibc/[image名称]/ 中,有一个 installed-package-sizes.txt 文件,该文件列出了文件系统中安装的所有软件按大小排列,如:
同一个目录下还有一个 files-in-image.txt 文件,该文件列出了文件系统中所有文件的位置于大小以及权限。当然这个信息用treesize来分析编译生成的文件系统压缩包会更直观一点儿。

### 查询内核/barebox/或其他软件的版本

#### 方法1(适合在有yocto bsp环境的情况下查看)

本方法参考这里写成:

http://www.phytec.de/documents/l-813e-5-yocto-reference-manual/#How_to_know_your_Kernel_and_Bootloader_Recipe_and_Version

首先,确定kernel的包名称,以下以PD17.1.2的imx6ul为例。
$PREFERRED_PROVIDER_virtual/kernel_mx6ul
PREFERRED_PROVIDER_virtual/kernel_mx6ul="linux-imx"
$PREFERRED_PROVIDER_virtual/kernel [2 operations]
PREFERRED_PROVIDER_virtual/kernel="linux-imx" % bitbake virtual/bootloader -e | grep "PREFERRED_PROVIDER_virtual/bootloader"
$PREFERRED_PROVIDER_virtual/bootloader
PREFERRED_PROVIDER_virtual/bootloader="barebox"
以上可以看到bootloader为barebox,kernel为linux-imx,下面查找kernel的版本:
bootloader的版本:
也就是说kernel的git tag为4.1.15-phy3,barebox 为 2017.04.0-phy3。

用这个方法也可以查看其他软件的版本,如QT,busybox。
#### 方法2(不需要yocto环境)
我们的所有源代码都是放在
https://git.phytec.de/
里的,在初始化BSP时,使用的是 phy2octo 工具。
https://git.phytec.de/phy2octo
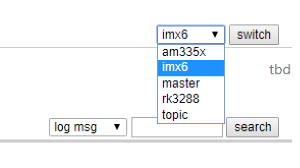
在这个repo中,可以切换到对应版本的branch,比如imx6

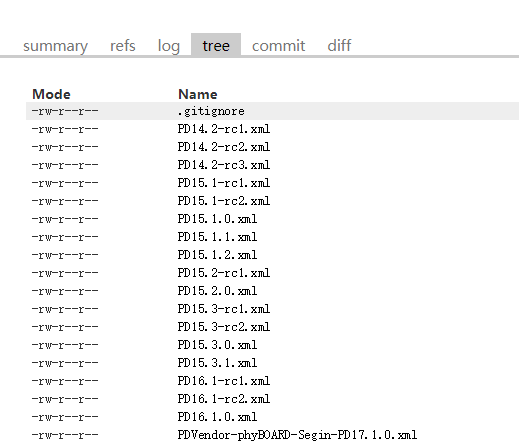
接下来在tree中就可以看到这个branch的源代码
https://git.phytec.de/phy2octo/tree/?h=imx6

打开对应版本的xml文件,就可以看到该版本的BSP包对应的其他layer是哪个版本的,从中就可以查到具体的软件是哪个版本。
https://git.phytec.de/phy2octo/tree/PD16.1.0.xml?h=imx6
那么我们以kernel为例子,打开meta-phytec的 2.1.2-phy4版本

https://git.phytec.de/meta-phytec/tree/recipes-kernel/linux?h=2.1.2-phy4

在 recipes-kernel/linux/[linux-mainline_4.1.36-phy3.bb](http://linux-mainline_4.1.36-phy3.bb/) 中可以找到kernel的bb文件。

https://git.phytec.de/meta-phytec/tree/recipes-kernel/linux/linux-mainline_4.1.36-phy3.bb?h=2.1.2-phy4
Copyright (C) 2015 PHYTEC Messtechnik GmbH,
Author: Stefan Christ s.christ@phytec.de
inherit phygittag inherit buildinfo include linux-common.inc
GIT_URL = "git://git.phytec.de/{PN}" SRC_URI = "{GIT_URL};branch=${BRANCH}"
PR = "${INC_PR}.0"
NOTE: PV must be in the format "x.y.z-.*". It cannot begin with a 'v'.
NOTE: Keep version in filename in sync with commit id!
SRCREV = "2daddfb77a87b8353fdd06ce548c5ae8ca5f9c0a"
S = "${WORKDIR}/git"
COMPATIBLE_MACHINE = "phyflex-imx6-1" COMPATIBLE_MACHINE .= "|phyflex-imx6-2" COMPATIBLE_MACHINE .= "|phyflex-imx6-3" COMPATIBLE_MACHINE .= "|phyflex-imx6-4" COMPATIBLE_MACHINE .= "|phyflex-imx6-5" COMPATIBLE_MACHINE .= "|phyflex-imx6-6" COMPATIBLE_MACHINE .= "|phyflex-imx6-7" COMPATIBLE_MACHINE .= "|phyflex-imx6-8" COMPATIBLE_MACHINE .= "|phyflex-imx6-9" COMPATIBLE_MACHINE .= "|phyflex-imx6-10"
COMPATIBLE_MACHINE .= "|phycard-imx6-1" COMPATIBLE_MACHINE .= "|phycard-imx6-2"
COMPATIBLE_MACHINE .= "|phyboard-alcor-imx6-1" COMPATIBLE_MACHINE .= "|phyboard-subra-imx6-1" COMPATIBLE_MACHINE .= "|phyboard-subra-imx6-2"
COMPATIBLE_MACHINE .= "|phyboard-mira-imx6-3" COMPATIBLE_MACHINE .= "|phyboard-mira-imx6-4" COMPATIBLE_MACHINE .= "|phyboard-mira-imx6-5" COMPATIBLE_MACHINE .= "|phyboard-mira-imx6-6" COMPATIBLE_MACHINE .= "|phyboard-mira-imx6-7" COMPATIBLE_MACHINE .= "|phyboard-mira-imx6-9" COMPATIBLE_MACHINE .= "|phyboard-mira-imx6-10" COMPATIBLE_MACHINE .= "|phyboard-mira-imx6-11" COMPATIBLE_MACHINE .= "|phyboard-mira-imx6-12"
可以从下面的COMPATIBLE_MACHINE 看出他就是对应的imx6 soc的bb文件。

那么对应的linux版本就是 4.1.36-phy3,然后在

https://git.phytec.de/linux-mainline/

的tag中,就可以找到这个版本的kernel source

https://git.phytec.de/linux-mainline/tag/?h=v4.1.36-phy3

### 查找machine对应的设备树dts文件名与位置

在 sources/meta-phytec/conf/machine 中找到 build/conf/local.conf 定义的 MACHINE 变量 对应的 .conf 文件。

local.conf文件:
DISTRO ?= "yogurt"
machine 目录:
然后打开该文件 phyboard-mira-imx6-3.conf
@TYPE: Machine
@NAME: phyboard-mira-imx6-3
@DESCRIPTION: PHYTEC phyBOARD-Mira i.MX6 Quad, 1GiB RAM, NAND
@ARTICLENUMBERS: PB-01501-002.A2, PBA-C-06-002.A2, PCM-058-33230C0I.A3
@SUPPORTEDIMAGE: phytec-qt5demo-image
require conf/machine/include/phyimx6qdl.inc
SOC_FAMILY .= ":mx6q" SOC_FAMILY .= ":phyboard-mira-imx6"
Kernel
KERNEL_DEVICETREE = "imx6q-phytec-mira-rdk-nand.dtb"
Barebox Config
BAREBOX_BIN = "images/barebox-phytec-phycore-imx6q-som-nand-1gib.img"
MACHINE_FEATURES += "resistivetouch pci can wifi"
SERIAL_CONSOLES = "115200;ttymxc1"
KERNEL_DEVICETREE变量定义了根DTS文件的名称。

接下来在kernel-source中的 arch/arm/boot/dts 目录中就可以找到对应的dts文件,注意在conf文件中定义的是dtb。
/dts-v1/;
include "imx6q.dtsi"
include "imx6qdl-phytec-phycore-som.dtsi"
include "imx6qdl-phytec-mira.dtsi"
include "imx6qdl-phytec-mira-peb-eval-01.dtsi"
include "imx6qdl-phytec-mira-peb-av-02.dtsi"
include "imx6qdl-phytec-peb-wlbt-01.dtsi"
/ { model = "Phytec phyBOARD-MIRA Quad Carrier-Board with nand"; compatible = "phytec,imx6q-pbac06", "phytec,imx6qdl-pcm058", "fsl,imx6q";
    aliases {
            ipu1 = &ipu2;
    };

    chosen {
            linux,stdout-path = &uart2;
    };
};
&can1 { status = "okay"; };
&fec { status = "okay"; };
在这个文件中就可以看到整个machine的设备树。

### 检查yocto编译环境的变量
这个指令的输出可以直接grep 或者用 > 输出到一个文件后打开查看。
Yocto(Bitbake)中加速git子模块拉取
目前是在configure阶段拉取子模块,耗费大量时间:
do_configure_prepend() {
    cd ${S}
    git submodule update --init --recursive
}
找到一篇文章介绍一种抛弃git内部submodule管理,自行拉取子模块的方法
Bitbake and Git Submodules Done Right https://amboar.github.io/notes/2019/08/30/bitbake-and-git-submodules.html
它给出的例子:
SRCREV_FORMAT = "glm_gli"
SRCREV_glm = "01f9ab5b6d21e5062ac0f6e0f205c7fa2ca9d769"
SRCREV_gli = "8e43030b3e12bb58a4663d85adc5c752f89099c0"
SRCREV = "ae0b59c6e2e8630a2ae26f4a0b7a72cbe7547948"

SRC_URI = "git://github.com/SaschaWillems/Vulkan.git \
           git://github.com/g-truc/glm;destsuffix=git/external/glm;name=glm \
           git://github.com/g-truc/gli;destsuffix=git/external/gli;name=gli \
           file://0001-Don-t-build-demos-with-questionably-licensed-data.patch \
"
这样就能实现子模块不更新则不拉取、只选用部分子模块,缩短构建时间。
但是我们的工程依赖了太多的子模块,手动管理不现实...